Cutting the Brisket When Butchering the Beef
 Brisket is one of the standards of barbeque. Whole towns and regions are measured on how well they cook this culinary conundrum. The pros know that trimming the brisket is the most crucial part of the cook. Without proper brisket trimming there can be no mouthwatering results.
Step 1: Pick your Brisket
Let's start with picking your brisket. You want a brisket big enough to weather the heat yet you don't want one so big that it is too big for your cooker. We recommend finding a brisket between 15 and 17 pounds. Also look for one that has the best marbling of fat in brisket flat. Don't be afraid to pick the brisket up and look it over or even ask if the meat department can bring some more briskets out for you to look at.
Step 2: Give it a Rinse & Choose Your Knife

Once you have the brisket home, the night before the cook, take the brisket out of the package and give it a rinse and let it dry. Now you need to consider what knife to use in trimming. Any knife will work, but a good boning knife makes the task easier. Any of the three knives in the picture below will work just fine, but the knife in the middle had a good blade length that allows for flatter trimming cuts to remove fat.
Step 3: Plan Your Cuts
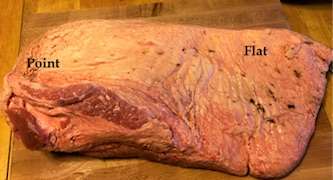
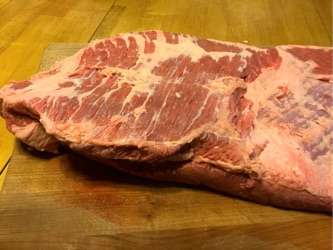
Lay the brisket out on your cutting board fat side up. Work from the flat side towards the point side. You will notice there are a few kinds of fat on the brisket. Some of it is nearly like a leather skin; some is very waxy and dense and the rest is softer more delicate. The first two types fat will never render down.
Let's repeat that.
The big hunks of fat will never—no matter how much you cook them—render down and be anything more than a mouth full of fat. Leaving that fat on your brisket will only result in you having to cut around it later, and it drives up the cooking time of the brisket. The more mass, the longer it will take to heat that mass and achieve the internal temperature you want.
Step 4: Start Trimming
Using very shallow cuts with your knife blade almost parallel with the brisket, start by making a cut long enough that allows you to hold the fat you just cut with your left hand while continuing to trim with the knife you right hand.
Compare the picture above and below to see how we've started to roll up the fat from flat side towards the point side. You will accidentally cut into the meat in spots, which is ok. Just keep your strokes as shallow as possible.
Also note the fat that is left on the flat below is that delicate fat. As a general rule, you can leave about a ¼ inch of fat on the brisket if you don't want to trim it as close as the image shows. Remember that seasoning and smoke will never penetrate much farther than about ¼ inch, so if you want more flavor in your brisket, you are going to have to trim it pretty tight. As you trim away the fat toss it in your trash bowl.
Step 5: Remove All of the Surface Fat
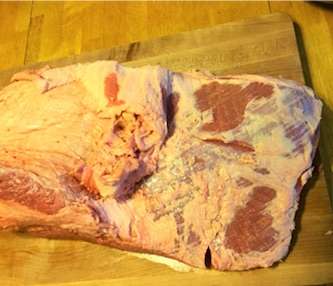
Continue to work slowly from the flat side to the point side. The point will have a lot of very thick waxy fat on it. Just take your time and have patience. Once you are done, the "fat" side of your brisket should look like the picture below.
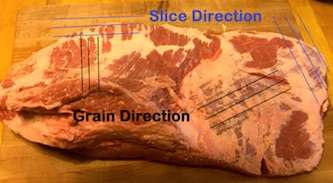
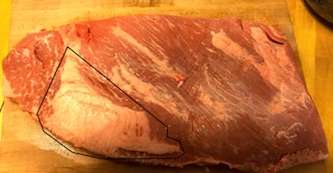
When you are done trimming, take a minute to really examine the flat and point ends of your brisket and note what direction the grain is running. You want to note this because when it comes to slice you want to slice across the grain (black annotations) of your brisket to make the tender slices (blue annotations) possible. You will also notice that the grain of the point and flat do not match. That is why the point and flat are usually separated once the cooking is completed.
Step 6: Cut Out the Point End Fat
Now that you have the fat removed all the surface fat from the fat side there is one more area we need to focus on. Note in the picture below, there is a big hunk of fat (circled in black) that resides toward the point end of the brisket, but it actually partially separates the point and flat.
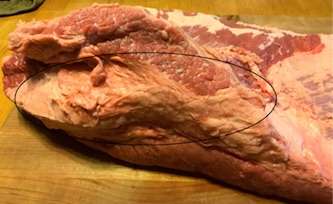
You want to do your best to trim that out as much as possible. This is where the longer blade of the boning knife comes in handy because you have to make some very vertical cuts to dissect this fat from the brisket. You can see what that looks like over the course of the next few pictures.
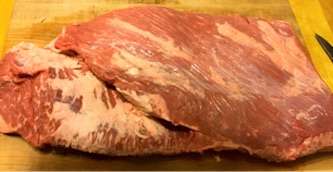
Step 7: Pause to Admire Your Work
Before you turn the brisket over and work on the other side, take note of how much more uniform the brisket now is and think about how much even it will cook now that all that inedible fat has been removed.
Step 8: Turn & Repeat
Flip the brisket over and work on the "meat" side. You will note immediately the lack of waxy fat and skin that has to be removed. You need to remove another hunk of fat much like what was just removed on the opposite side. You will use the same deeper cuts and dissect this hunk of fat out. Be careful, as it is easy to accidentally cut through the fat and point and disconnect the flat and point. Go slow, and you can't go wrong.
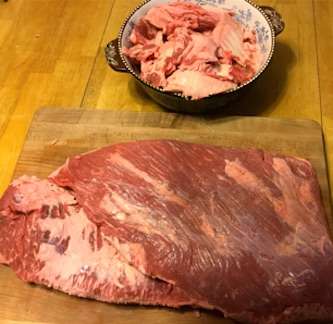
Step 9: Get Ready to Season Your Brisket
Removal of all this fat has saved about 4 to 6 hours of cook time depending on what temperature you opt to cook at. All of this fat is also no longer serving as a barrier for your seasoning and rub.
Step 10: Discard Excess Fat
The excess fat can be ground up and added to sausage if you make your own sausage. Otherwise, it is mostly trash.
Source: https://www.grillagrills.com/recipes/how-to-trim-a-brisket
0 Response to "Cutting the Brisket When Butchering the Beef"
Post a Comment